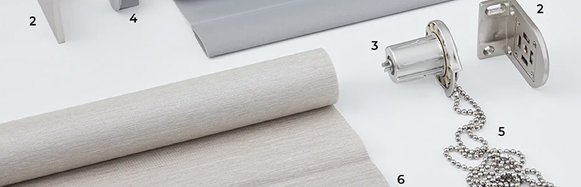
Your custom kit:

OK it’s time to start installing,
let’s take it step by step
Ceiling mount
1. Get organised
A. After unpacking your kit, carefully spread everything out on a spotless, sturdy surface or the cardboard container it arrived in.
B. Place your track close to your window to measure its width and mark the installation location.
When working with two or more tracks, place your track joiner or joiners on the ground and click the ends of two tracks into it so that they meet in the center of the joiner. For center-opening curtains, the track joiner or joiners will be in the center; if your curtains stack left or right, they will be on the side that is least visible.
C. Place your track close to your window to measure its width and mark the installation location.
When working with two or more tracks, place your track joiner or joiners on the ground and click the ends of two tracks into it so that they meet in the center of the joiner. For center-opening curtains, the track joiner or joiners will be in the center; if your curtains stack left or right, they will be on the side that is least visible.
2. Mark your ceiling battens
A. Use your stud finder to locate your ceiling battens if they are lengthwise. On each ceiling batten that your curtains will cover, mark it with a pencil 35 mm from your wall, or from any projecting window frames or roller blinds. The back of your brackets should align with these marks.
Make a second set of pencil markings on each ceiling batten that your curtains will cover, if you have a double track. These marks should be 145 mm from your wall, or from any projecting window frames or roller blinds. The rear of your brackets should align with these markers for your front track.
You’ll need brackets close to both ends and the center of the track, and they will screw into your ceiling battens.
B. If your ceiling battens are widthwise, locate the batten from which your curtains will hang using your stud finder, then mark it with a pencil. The distance between the ceiling batten and your wall must be at least 35 mm.
If you have a double track, locate the ceiling batten from which your front track will hang using your stud finder once more. Then, draw pencil lines down the batten. In order to allow for two tracks, the ceiling batten must be at least 145 mm from your wall.
You’ll need brackets close to both ends and the center of the track, and these will screw into your ceiling batten.
C. Not able to locate ceiling battens? Don’t worry! Call us if you need assistance locating your ceiling battens, as they are the ideal surface for hanging curtains. If you are unable to locate your ceiling battens, keep in mind that you can utilize plaster wall anchors.
Screwing into tile, brick, stone, or concrete? This step can be omitted entirely.
3. Screw in your brackets
A. Mark the screw holes with a pencil and align the back of each bracket with the pencil marks on your ceiling battens.
Don’t mark up and screw in your center brackets on each side of the track joiner(s) just yet if you have two or more pieces of track.
B. Drill each hole with your cordless drill and the 3 mm drill bit while wearing safety glasses. If you’re drilling into the ceiling battens, look for wood shavings.
C. Using the screws in your custom kit and your cordless drill with the Phillips head drill bit, screw your brackets partially into your ceiling so they are still somewhat loose.
4. Click in your track
A. Click your track into the middle bracket after picking it up.
B. To secure the track in place, use your cordless drill to tighten the screws in the center bracket.
As you tighten the screws, make sure the track is firmly fixed in place by clicking it into the other brackets.
Simply follow the same procedures to click in both tracks if you have a double track.
Click the linked tracks into the brackets if there are two or more tracks. After positioning your center brackets on either side of your track joiner or joiners, mark the location of their attachment with a pencil. Ideally, this will be mounted on battens in the ceiling.
C. To screw in your middle brackets, unclick your linked tracks and proceed to step 3. After that, click your track back into each bracket using step 4, then tighten the screws to secure it.
Simply use the same procedures to click in both connected tracks if you have a double track.
5. Click in your curtains
A. Check the top of your curtain panels and make sure there’s a pendant or hook attached to each press stud.
Missing a pendant or hook? Simply grab a spare pendant or hook from your custom kit and click it onto the press stud, where the pendant or hook is missing.
B. For S fold curtains, click each pendant into your track, starting at one edge. Take care not to miss any pendants. Make the S shape as you go, by folding the fabric alternately forwards then backwards.
If you have a double track, click the curtains into the rear track closest to your wall first, then repeat for the front track.
C. Attach each hook onto your track if you’re using pleated curtains. Be careful not to overlook any hooks.
Click the curtains into the back track nearest your wall first, then the front track if you have a double track.
6. Get Insta ready
You’re prepared to assist your curtains in creating flawless S folds. Make sure the heading is fashioned like an S, starting at the top. You can begin decorating the curtain’s body after finishing the heading. Work in a sequential manner from one side of the curtain to the other, making sure that when the curtains are drawn open, each S fold runs from top to bottom.
Since an S-fold curtain has a structured heading, it only needs to be dressed once during installation and never again. The heading provides you with uncomplicated pleasure by doing all the work. All you have to do is run your fingers through your curtains and twist the fabric to follow the folds from the top heading to the bottom if your curtains ever get tangled. That’s simple.
Face mount
1. Get organised
A. After unpacking your kit, carefully spread everything out on a spotless, sturdy surface or the cardboard container it arrived in.
B. Place your track close to your window to measure its width and mark the installation location.
When working with two or more tracks, place your track joiner or joiners on the ground and click the ends of two tracks into it so that they meet in the center of the joiner. For center-opening curtains, the track joiner or joiners will be in the center; if your curtains stack left or right, they will be on the side that is least visible.
C. Verify the number of brackets required for the width of your track. Place the brackets 600 mm apart and align them with your track. The typical spacing between wall studs is this.
You’ll also need two brackets on either side of the track joiner(s) if you have two or more pieces of track. Because the joiner is 85 mm long, space these brackets at least 85 mm apart.
2. Mark your wall studs
A. Use your stud finder to locate your wall studs if they are lengthwise. Mark the precise height at which your curtains will begin with a pencil mark on each wall stud that your curtains will cover. You can refer back to the measurement you made of the descent.
You’ll need brackets close to both ends and the center of the track, and they will screw into your wall studs.
B. Use your stud finder to locate your wall studs if they are widthwise. Mark the precise height at which your curtains will begin with pencil along the wall stud from which they will hang. You can refer back to the measurement you made of the descent.
You’ll need brackets close to both ends and the center of the track, and they will screw into your wall stud.
C. Unable to locate wall studs? Don’t worry! The best place to hang curtains is on wall studs, so if you need assistance locating your studs, give us a call. If you are unable to locate your wall studs, keep in mind that you can utilize plaster wall anchors.
Screwing into tile, brick, stone, or concrete? This step can be omitted entirely.
3. Screw in your brackets
A. Mark the screw holes with a pencil and align the arm of each bracket with the pencil marks on your wall studs.
Don’t mark up and screw in your center brackets on each side of the track joiner(s) just yet if you have two or more pieces of track.
B. Drill each hole with your cordless drill and the 3 mm drill bit while wearing safety glasses. To determine whether you are drilling into a wall stud, look for wood shavings.
C. Using the screws in your custom kit and your cordless drill with the Phillips head drill bit, firmly screw the brackets into the wall.
4. Click in your track
A. In every bracket that is designated A in the diagram, loosen the screw.
B. Click your track into each bracket after picking it up. To secure the track in place and ensure it is secure, tighten screw A on each bracket.
Click the linked tracks into your brackets after loosening the screws designated A for two or more pieces of track. After positioning your center brackets on either side of your track joiner or joiners, mark the location of their attachment with a pencil. Ideally, this will be mounted on wall studs.
To screw in your middle brackets, unclick your linked tracks and proceed to step 3. Then, in step 4, click your track back into each bracket and tighten each screw that is marked A to secure it.
5. Click in your curtains
A. Verify that each press stud on the top of your curtain panels has a pendant or hook connected.
Are you missing a hook or pendant? Just take an extra pendant or hook from your personalized kit and attach it to the press stud in place of the one that is missing.
B. Click each pendant into your track, beginning at one edge, for S-fold curtains. Be sure not to overlook any pendants. As you proceed, fold the fabric in alternating forward and backward directions to form the S shape.
C. Attach each hook onto your track if you’re using pleated curtains. Be careful not to overlook any hooks.
6. Get Insta ready
You’re prepared to assist your curtains in creating flawless S folds. Make sure the heading is fashioned like an S, starting at the top. You can begin decorating the curtain’s body after finishing the heading. Work in a sequential manner from one side of the curtain to the other, making sure that when the curtains are drawn open, each S fold runs from top to bottom.
Since an S-fold curtain has a structured heading, it only needs to be dressed once during installation and never again. The heading provides you with uncomplicated pleasure by doing all the work. All you have to do is run your fingers through your curtains and twist the fabric to follow the folds from the top heading to the bottom if your curtains ever get tangled. That’s simple.
- Onto your ceiling
-
Ceiling mount
1. Get organised
A. After unpacking your kit, carefully spread everything out on a spotless, sturdy surface or the cardboard container it arrived in.
B. Place your track close to your window to measure its width and mark the installation location.
When working with two or more tracks, place your track joiner or joiners on the ground and click the ends of two tracks into it so that they meet in the center of the joiner. For center-opening curtains, the track joiner or joiners will be in the center; if your curtains stack left or right, they will be on the side that is least visible.
C. Place your track close to your window to measure its width and mark the installation location.
When working with two or more tracks, place your track joiner or joiners on the ground and click the ends of two tracks into it so that they meet in the center of the joiner. For center-opening curtains, the track joiner or joiners will be in the center; if your curtains stack left or right, they will be on the side that is least visible.
2. Mark your ceiling battens
A. Use your stud finder to locate your ceiling battens if they are lengthwise. On each ceiling batten that your curtains will cover, mark it with a pencil 35 mm from your wall, or from any projecting window frames or roller blinds. The back of your brackets should align with these marks.
Make a second set of pencil markings on each ceiling batten that your curtains will cover, if you have a double track. These marks should be 145 mm from your wall, or from any projecting window frames or roller blinds. The rear of your brackets should align with these markers for your front track.
You’ll need brackets close to both ends and the center of the track, and they will screw into your ceiling battens.
B. If your ceiling battens are widthwise, locate the batten from which your curtains will hang using your stud finder, then mark it with a pencil. The distance between the ceiling batten and your wall must be at least 35 mm.
If you have a double track, locate the ceiling batten from which your front track will hang using your stud finder once more. Then, draw pencil lines down the batten. In order to allow for two tracks, the ceiling batten must be at least 145 mm from your wall.
You’ll need brackets close to both ends and the center of the track, and these will screw into your ceiling batten.
C. Not able to locate ceiling battens? Don’t worry! Call us if you need assistance locating your ceiling battens, as they are the ideal surface for hanging curtains. If you are unable to locate your ceiling battens, keep in mind that you can utilize plaster wall anchors.
Screwing into tile, brick, stone, or concrete? This step can be omitted entirely.
3. Screw in your brackets
A. Mark the screw holes with a pencil and align the back of each bracket with the pencil marks on your ceiling battens.
Don’t mark up and screw in your center brackets on each side of the track joiner(s) just yet if you have two or more pieces of track.
B. Drill each hole with your cordless drill and the 3 mm drill bit while wearing safety glasses. If you’re drilling into the ceiling battens, look for wood shavings.
C. Using the screws in your custom kit and your cordless drill with the Phillips head drill bit, screw your brackets partially into your ceiling so they are still somewhat loose.
4. Click in your track
A. Click your track into the middle bracket after picking it up.
B. To secure the track in place, use your cordless drill to tighten the screws in the center bracket.
As you tighten the screws, make sure the track is firmly fixed in place by clicking it into the other brackets.
Simply follow the same procedures to click in both tracks if you have a double track.
Click the linked tracks into the brackets if there are two or more tracks. After positioning your center brackets on either side of your track joiner or joiners, mark the location of their attachment with a pencil. Ideally, this will be mounted on battens in the ceiling.
C. To screw in your middle brackets, unclick your linked tracks and proceed to step 3. After that, click your track back into each bracket using step 4, then tighten the screws to secure it.
Simply use the same procedures to click in both connected tracks if you have a double track.
5. Click in your curtains
A. Check the top of your curtain panels and make sure there’s a pendant or hook attached to each press stud.
Missing a pendant or hook? Simply grab a spare pendant or hook from your custom kit and click it onto the press stud, where the pendant or hook is missing.
B. For S fold curtains, click each pendant into your track, starting at one edge. Take care not to miss any pendants. Make the S shape as you go, by folding the fabric alternately forwards then backwards.
If you have a double track, click the curtains into the rear track closest to your wall first, then repeat for the front track.
C. Attach each hook onto your track if you’re using pleated curtains. Be careful not to overlook any hooks.
Click the curtains into the back track nearest your wall first, then the front track if you have a double track.
6. Get Insta ready
You’re prepared to assist your curtains in creating flawless S folds. Make sure the heading is fashioned like an S, starting at the top. You can begin decorating the curtain’s body after finishing the heading. Work in a sequential manner from one side of the curtain to the other, making sure that when the curtains are drawn open, each S fold runs from top to bottom.
Since an S-fold curtain has a structured heading, it only needs to be dressed once during installation and never again. The heading provides you with uncomplicated pleasure by doing all the work. All you have to do is run your fingers through your curtains and twist the fabric to follow the folds from the top heading to the bottom if your curtains ever get tangled. That’s simple.
- Onto your wall
-
Face mount
1. Get organised
A. After unpacking your kit, carefully spread everything out on a spotless, sturdy surface or the cardboard container it arrived in.
B. Place your track close to your window to measure its width and mark the installation location.
When working with two or more tracks, place your track joiner or joiners on the ground and click the ends of two tracks into it so that they meet in the center of the joiner. For center-opening curtains, the track joiner or joiners will be in the center; if your curtains stack left or right, they will be on the side that is least visible.
C. Verify the number of brackets required for the width of your track. Place the brackets 600 mm apart and align them with your track. The typical spacing between wall studs is this.
You’ll also need two brackets on either side of the track joiner(s) if you have two or more pieces of track. Because the joiner is 85 mm long, space these brackets at least 85 mm apart.
2. Mark your wall studs
A. Use your stud finder to locate your wall studs if they are lengthwise. Mark the precise height at which your curtains will begin with a pencil mark on each wall stud that your curtains will cover. You can refer back to the measurement you made of the descent.
You’ll need brackets close to both ends and the center of the track, and they will screw into your wall studs.
B. Use your stud finder to locate your wall studs if they are widthwise. Mark the precise height at which your curtains will begin with pencil along the wall stud from which they will hang. You can refer back to the measurement you made of the descent.
You’ll need brackets close to both ends and the center of the track, and they will screw into your wall stud.
C. Unable to locate wall studs? Don’t worry! The best place to hang curtains is on wall studs, so if you need assistance locating your studs, give us a call. If you are unable to locate your wall studs, keep in mind that you can utilize plaster wall anchors.
Screwing into tile, brick, stone, or concrete? This step can be omitted entirely.
3. Screw in your brackets
A. Mark the screw holes with a pencil and align the arm of each bracket with the pencil marks on your wall studs.
Don’t mark up and screw in your center brackets on each side of the track joiner(s) just yet if you have two or more pieces of track.
B. Drill each hole with your cordless drill and the 3 mm drill bit while wearing safety glasses. To determine whether you are drilling into a wall stud, look for wood shavings.
C. Using the screws in your custom kit and your cordless drill with the Phillips head drill bit, firmly screw the brackets into the wall.
4. Click in your track
A. In every bracket that is designated A in the diagram, loosen the screw.
B. Click your track into each bracket after picking it up. To secure the track in place and ensure it is secure, tighten screw A on each bracket.
Click the linked tracks into your brackets after loosening the screws designated A for two or more pieces of track. After positioning your center brackets on either side of your track joiner or joiners, mark the location of their attachment with a pencil. Ideally, this will be mounted on wall studs.
To screw in your middle brackets, unclick your linked tracks and proceed to step 3. Then, in step 4, click your track back into each bracket and tighten each screw that is marked A to secure it.
5. Click in your curtains
A. Verify that each press stud on the top of your curtain panels has a pendant or hook connected.
Are you missing a hook or pendant? Just take an extra pendant or hook from your personalized kit and attach it to the press stud in place of the one that is missing.
B. Click each pendant into your track, beginning at one edge, for S-fold curtains. Be sure not to overlook any pendants. As you proceed, fold the fabric in alternating forward and backward directions to form the S shape.
C. Attach each hook onto your track if you’re using pleated curtains. Be careful not to overlook any hooks.
6. Get Insta ready
You’re prepared to assist your curtains in creating flawless S folds. Make sure the heading is fashioned like an S, starting at the top. You can begin decorating the curtain’s body after finishing the heading. Work in a sequential manner from one side of the curtain to the other, making sure that when the curtains are drawn open, each S fold runs from top to bottom.
Since an S-fold curtain has a structured heading, it only needs to be dressed once during installation and never again. The heading provides you with uncomplicated pleasure by doing all the work. All you have to do is run your fingers through your curtains and twist the fabric to follow the folds from the top heading to the bottom if your curtains ever get tangled. That’s simple.
Have Questions? Reach Out and Inquiry Now
If you have any questions or need assistance, don’t hesitate to reach out! We're here to help and provide the information you need. Whether it's a quick inquiry or a detailed discussion, just let us know how we can assist you today.