Your custom kit:

OK it’s time to start installing,
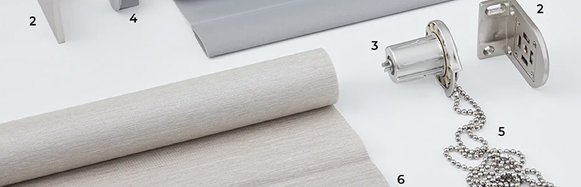
let’s take it step by step
Face fit
1. Get organised
A. Lay out your roller blind under your window on a spotless surface after unpacking your personalized kit.
B. Since you will be mounting them as one in steps two and three, if you ordered a pelmet, now is the moment to slide your brackets into the pelmet returns.
2. Mark up
A. Grab both brackets and your pencil. Mark two level dots where the brackets will be fastened to the frame using screws after lifting each bracket into place.
B. This will be located in your frame’s upper corners.
3. Attach your brackets
A. Pre-drill two holes where you marked the two pencil dots using your cordless drill and the 3 mm drill bit.
B. Place the chain drive bracket on the side of the frame where your chain will rest after picking it up. The two holes you just drilled should be exactly over the holes in the bracket. Using your cordless drill and the Phillips head drill bit, fasten the bracket using the screws included in your customized package.
For the pin end bracket, repeat the procedure.
C. If you ordered a pelmet, proceed as before. Just keep in mind that your bracket and pelmet return will be attached together.
4. Click in your blind
A. Make sure your chain and chain bracket are on the same side when you pick up your roller blind. Verify that the ACMEDA logo is at six o’clock and the hood over the chain is at twelve.
B. Gently slot the chain end into the chain drive bracket.
C. After that, insert the pin end into the bracket until a click is heard.
Not quite right? Don’t worry. It should be easy for your blind to click into the brackets. Go to ‘I need some extra help’ at the bottom if it doesn’t.
5. Make it child safe
A. Mark the dot where the screw will secure the p clip to the wall or frame, then click it at the bottom of the chain loop and hold it there. Keep in mind that the chain should hang down with little strain.
B. Using the Phillips head drill bit on your cordless drill, screw the P clip onto your wall or frame. It’s recommended to attach to a wooden frame or wall studs; if not, conduct your research.
C. Australian child safety regulations are taken carefully by us. According to them, if the chain is less than 1.6 meters from the ground, a P clip must be installed. This is to eliminate the possibility of strangulation. For further information, see ‘Let’s get honest about child safety’ at the bottom.
D. Installing the ball stopper is crucial to ensuring your blind works smoothly and is still protected under warranty. Grab your ball stopper and click it into the very top of the chain after rolling it down until you’re satisfied with where it ends. This step is essential since it helps guarantee that your new roller blind will operate with quality.
6. Get Insta ready
A. Place both bracket covers on the outside of each bracket by sliding them on.
B. If you ordered a pelmet, clip the other side in place with a little push after attaching it to one bracket. After it’s up, your blind rolls up and down with ease, and the pelmet fits neatly in the pelmet returns.
Face fit frameless window
1. Get organised
A. Place both bracket covers on the outside of each bracket by sliding them on.Lay out your roller blind under your window on a spotless surface after unpacking your personalized kit.
B. Since you will be mounting them as one in steps two and three, if you ordered a pelmet, now is the moment to slide your brackets into the pelmet returns.
2. Mark up
A. Grab both brackets and your pencil. Mark two level dots where the brackets will be fastened to the wall with screws after lifting each bracket into place.
B. This will be at least 70 mm above the top of your window and 35 mm out from each side. Refer back to your first measurements.
3. Attach your brackets
A. Place the chain drive bracket on the window’s side where your chain will rest after picking it up. The two holes you just drilled should be exactly over the holes in the bracket. Using your cordless drill and the Phillips head drill bit, fasten the bracket using the screws included in your customized package.
For the pin end bracket, repeat the procedure.
B. Pick up the chain drive bracket and position it on the side of the window where your chain will sit. The holes in the bracket should be directly over the two holes you just drilled. Secure the bracket with the screws in your custom kit, using your cordless drill with the Phillips head drill bit.
Repeat the process for the pin end bracket.
C. If you ordered a pelmet, proceed as before. Just keep in mind that your bracket and pelmet return will be attached together.
4. Click in your blind
A. Make sure your chain and chain bracket are on the same side when you pick up your roller blind. Verify that the ACMEDA logo is at six o’clock and the hood over the chain is at twelve.
B. The chain end should be inserted into the chain drive bracket gently.
C. After that, insert the pin end into the bracket until a click is heard.
Not quite right? Don’t worry. It should be easy for your blind to click into the brackets. Go to ‘I need some extra help’ at the bottom if it doesn’t.
5. Make it child safe
A. Mark the dot where the screw will secure the p clip to the wall or frame, then click it at the bottom of the chain loop and hold it there. Keep in mind that the chain should hang down with little strain.
B. Using the Phillips head drill bit on your cordless drill, screw the P clip onto your wall or frame. It’s recommended to attach to a wooden frame or wall studs; if not, conduct your research.
C. Australian child safety regulations are taken carefully by us. According to them, if the chain is less than 1.6 meters from the ground, a P clip must be installed. This is to eliminate the possibility of strangulation. For further information, see ‘Let’s get honest about child safety’ at the bottom.
6. Get Insta ready
A. To precisely control where the blind rolls down, use the ball stopper. Grab your ball stopper and click it into the very top of the chain after rolling it down until you’re satisfied with where it ends. By relieving some of the strain on the cloth, this will help your blinds last as long as possible.
B. If you ordered a pelmet, clip the other side in place with a little push after attaching it to one bracket. After it’s up, your blind rolls up and down with ease, and the pelmet fits neatly in the pelmet returns.
Get organised
1. Get Insta ready
A. After unpacking your personalized kit, place your roller blind under your window on a spotless floor.
2. Mark up
A. Grab both brackets and your pencil. Mark two level dots where the brackets will be fastened to the frame using screws after lifting each bracket into place.
B. This will be inside your frame, at the upper corners. Give yourself 10 mm of space between your windows’ glass. Don’t forget to account for small obstacles as well.
C. Take your two pelmet-sprung brackets if you have one. Position each bracket slightly apart from each blind bracket on the top underside of your frame. Align the bracket’s face with your frame’s front border. Where the bracket will be fastened to the frame with screws, mark two dots.
3. Attach your brackets
A. Pre-drill two holes where you marked the two pencil dots using your cordless drill and the 3 mm drill bit.
B. Place the chain drive bracket on the side of the frame where your chain will rest after picking it up. The two holes you just drilled should be exactly over the holes in the bracket. Using your cordless drill and the Phillips head drill bit, fasten the bracket using the screws included in your customized package.
For the pin end bracket, repeat the procedure.
C. Pre-drill two holes where you marked the pencil dots for each pelmet spring bracket if you have one. Using your cordless drill and the Phillips head drill bit, fasten your pelmet spring brackets with the screws included in your customized kit.
4. Click in your blind
A. Make sure your chain and chain bracket are on the same side when you pick up your roller blind. Verify that the ACMEDA logo is at six o’clock and the hood over the chain is at twelve.
B. The chain end should be inserted into the chain drive bracket gently.
C. After that, insert the pin end into the bracket until a click is heard.
Not quite right? Don’t worry. It should be easy for your blind to click into the brackets. Go to ‘I need some extra help’ at the bottom if it doesn’t.
5. Make it child safe
A. Mark the dot where the screw will secure the p clip to the frame, then click it at the bottom of the chain loop and hold it there. Keep in mind that the chain should hang down with little strain.
B. Using the Phillips head drill bit on your cordless drill, screw the P clip onto your frame. It’s recommended to attach to a wooden frame or wall studs; if not, conduct your research.
C. Australian child safety regulations are taken carefully by us. According to them, if the chain is less than 1.6 meters from the ground, a P clip must be installed. This is to eliminate the possibility of strangulation. For further information, see ‘Let’s get honest about child safety’ at the bottom.
6. Get Insta ready
A. To precisely control where the blind rolls down, use the ball stopper. Grab your ball stopper and click it into the very top of the chain after rolling it down until you’re satisfied with where it ends. By relieving some of the strain on the cloth, this will help your blinds last as long as possible.
B. If you ordered a pelmet, clip the other side in place with a little push after attaching it to one bracket. After it’s up, your blind rolls up and down with ease, and the pelmet fits neatly in the pelmet returns.
- Outside the frame
-
Face fit
1. Get organised
A. Lay out your roller blind under your window on a spotless surface after unpacking your personalized kit.
B. Since you will be mounting them as one in steps two and three, if you ordered a pelmet, now is the moment to slide your brackets into the pelmet returns.
2. Mark up
A. Grab both brackets and your pencil. Mark two level dots where the brackets will be fastened to the frame using screws after lifting each bracket into place.
B. This will be located in your frame’s upper corners.
3. Attach your brackets
A. Pre-drill two holes where you marked the two pencil dots using your cordless drill and the 3 mm drill bit.
B. Place the chain drive bracket on the side of the frame where your chain will rest after picking it up. The two holes you just drilled should be exactly over the holes in the bracket. Using your cordless drill and the Phillips head drill bit, fasten the bracket using the screws included in your customized package.
For the pin end bracket, repeat the procedure.
C. If you ordered a pelmet, proceed as before. Just keep in mind that your bracket and pelmet return will be attached together.
4. Click in your blind
A. Make sure your chain and chain bracket are on the same side when you pick up your roller blind. Verify that the ACMEDA logo is at six o’clock and the hood over the chain is at twelve.
B. Gently slot the chain end into the chain drive bracket.
C. After that, insert the pin end into the bracket until a click is heard.
Not quite right? Don’t worry. It should be easy for your blind to click into the brackets. Go to ‘I need some extra help’ at the bottom if it doesn’t.
5. Make it child safe
A. Mark the dot where the screw will secure the p clip to the wall or frame, then click it at the bottom of the chain loop and hold it there. Keep in mind that the chain should hang down with little strain.
B. Using the Phillips head drill bit on your cordless drill, screw the P clip onto your wall or frame. It’s recommended to attach to a wooden frame or wall studs; if not, conduct your research.
C. Australian child safety regulations are taken carefully by us. According to them, if the chain is less than 1.6 meters from the ground, a P clip must be installed. This is to eliminate the possibility of strangulation. For further information, see ‘Let’s get honest about child safety’ at the bottom.
D. Installing the ball stopper is crucial to ensuring your blind works smoothly and is still protected under warranty. Grab your ball stopper and click it into the very top of the chain after rolling it down until you’re satisfied with where it ends. This step is essential since it helps guarantee that your new roller blind will operate with quality.
6. Get Insta ready
A. Place both bracket covers on the outside of each bracket by sliding them on.
B. If you ordered a pelmet, clip the other side in place with a little push after attaching it to one bracket. After it’s up, your blind rolls up and down with ease, and the pelmet fits neatly in the pelmet returns.
- Outside a frameless window
-
Face fit frameless window
1. Get organised
A. Place both bracket covers on the outside of each bracket by sliding them on.Lay out your roller blind under your window on a spotless surface after unpacking your personalized kit.
B. Since you will be mounting them as one in steps two and three, if you ordered a pelmet, now is the moment to slide your brackets into the pelmet returns.
2. Mark up
A. Grab both brackets and your pencil. Mark two level dots where the brackets will be fastened to the wall with screws after lifting each bracket into place.
B. This will be at least 70 mm above the top of your window and 35 mm out from each side. Refer back to your first measurements.
3. Attach your brackets
A. Place the chain drive bracket on the window’s side where your chain will rest after picking it up. The two holes you just drilled should be exactly over the holes in the bracket. Using your cordless drill and the Phillips head drill bit, fasten the bracket using the screws included in your customized package.
For the pin end bracket, repeat the procedure.
B. Pick up the chain drive bracket and position it on the side of the window where your chain will sit. The holes in the bracket should be directly over the two holes you just drilled. Secure the bracket with the screws in your custom kit, using your cordless drill with the Phillips head drill bit.
Repeat the process for the pin end bracket.
C. If you ordered a pelmet, proceed as before. Just keep in mind that your bracket and pelmet return will be attached together.
4. Click in your blind
A. Make sure your chain and chain bracket are on the same side when you pick up your roller blind. Verify that the ACMEDA logo is at six o’clock and the hood over the chain is at twelve.
B. The chain end should be inserted into the chain drive bracket gently.
C. After that, insert the pin end into the bracket until a click is heard.
Not quite right? Don’t worry. It should be easy for your blind to click into the brackets. Go to ‘I need some extra help’ at the bottom if it doesn’t.
5. Make it child safe
A. Mark the dot where the screw will secure the p clip to the wall or frame, then click it at the bottom of the chain loop and hold it there. Keep in mind that the chain should hang down with little strain.
B. Using the Phillips head drill bit on your cordless drill, screw the P clip onto your wall or frame. It’s recommended to attach to a wooden frame or wall studs; if not, conduct your research.
C. Australian child safety regulations are taken carefully by us. According to them, if the chain is less than 1.6 meters from the ground, a P clip must be installed. This is to eliminate the possibility of strangulation. For further information, see ‘Let’s get honest about child safety’ at the bottom.6. Get Insta ready
A. To precisely control where the blind rolls down, use the ball stopper. Grab your ball stopper and click it into the very top of the chain after rolling it down until you’re satisfied with where it ends. By relieving some of the strain on the cloth, this will help your blinds last as long as possible.
B. If you ordered a pelmet, clip the other side in place with a little push after attaching it to one bracket. After it’s up, your blind rolls up and down with ease, and the pelmet fits neatly in the pelmet returns.
- Inside the frame
-
Get organised
1. Get Insta ready
A. After unpacking your personalized kit, place your roller blind under your window on a spotless floor.
2. Mark up
A. Grab both brackets and your pencil. Mark two level dots where the brackets will be fastened to the frame using screws after lifting each bracket into place.
B. This will be inside your frame, at the upper corners. Give yourself 10 mm of space between your windows’ glass. Don’t forget to account for small obstacles as well.
C. Take your two pelmet-sprung brackets if you have one. Position each bracket slightly apart from each blind bracket on the top underside of your frame. Align the bracket’s face with your frame’s front border. Where the bracket will be fastened to the frame with screws, mark two dots.
3. Attach your brackets
A. Pre-drill two holes where you marked the two pencil dots using your cordless drill and the 3 mm drill bit.
B. Place the chain drive bracket on the side of the frame where your chain will rest after picking it up. The two holes you just drilled should be exactly over the holes in the bracket. Using your cordless drill and the Phillips head drill bit, fasten the bracket using the screws included in your customized package.
For the pin end bracket, repeat the procedure.C. Pre-drill two holes where you marked the pencil dots for each pelmet spring bracket if you have one. Using your cordless drill and the Phillips head drill bit, fasten your pelmet spring brackets with the screws included in your customized kit.
4. Click in your blind
A. Make sure your chain and chain bracket are on the same side when you pick up your roller blind. Verify that the ACMEDA logo is at six o’clock and the hood over the chain is at twelve.
B. The chain end should be inserted into the chain drive bracket gently.
C. After that, insert the pin end into the bracket until a click is heard.
Not quite right? Don’t worry. It should be easy for your blind to click into the brackets. Go to ‘I need some extra help’ at the bottom if it doesn’t.
5. Make it child safe
A. Mark the dot where the screw will secure the p clip to the frame, then click it at the bottom of the chain loop and hold it there. Keep in mind that the chain should hang down with little strain.
B. Using the Phillips head drill bit on your cordless drill, screw the P clip onto your frame. It’s recommended to attach to a wooden frame or wall studs; if not, conduct your research.
C. Australian child safety regulations are taken carefully by us. According to them, if the chain is less than 1.6 meters from the ground, a P clip must be installed. This is to eliminate the possibility of strangulation. For further information, see ‘Let’s get honest about child safety’ at the bottom.
6. Get Insta ready
A. To precisely control where the blind rolls down, use the ball stopper. Grab your ball stopper and click it into the very top of the chain after rolling it down until you’re satisfied with where it ends. By relieving some of the strain on the cloth, this will help your blinds last as long as possible.
B. If you ordered a pelmet, clip the other side in place with a little push after attaching it to one bracket. After it’s up, your blind rolls up and down with ease, and the pelmet fits neatly in the pelmet returns.
Let’s be honest about the safety of children.
Youngsters are unaware that if they sit down, roll about, or descend to the ground, a chain around their neck could tighten and choke them in a matter of minutes.
Youngsters have perished after becoming entangled in a slack chain or when the loop passed over their head while:
- slumbering in a bed or cot close to the chain hanging
- playing close to chains, or
- gazing out of a window while perched on a chair, couch, or bed.
- When installing your blinds, you must adhere to the guidelines set forth by the Australian Government.
- Follow this guide’s step 5 exactly when installing your P clip.
- The warning label that comes with your blind should not be removed.
- Put your name and contact information (or the information of the person installing your blinds for you) on your own label.
Have Questions? Reach Out and Inquiry Now
If you have any questions or need assistance, don’t hesitate to reach out! We're here to help and provide the information you need. Whether it's a quick inquiry or a detailed discussion, just let us know how we can assist you today.